Questions
How to use a USB SNES controller on a Mac
Plug it in: a USB SNES style controller, the flat dog-bone pad sold by Tomee, Retrolink, iBuffalo and a long list of unbranded copies, works on a Mac with no driver. What macOS does not do is call it a game controller, so it never shows up in System Settings, Game Controllers, and most Mac games act as if it is not there.
Emulators read it directly. For everything else I make InputConfig, a free Mac app that turns the pad's buttons into the keys a game or app expects. NES style USB pads work the same way, with fewer buttons.
On this page: 10 sections
Check that the Mac reads it
These pads are plain USB HID devices, the same family as a keyboard or a joystick. macOS needs nothing installed to read them, and no driver download changes how games see them.
- You: Hold Option, open the Apple menu, choose System Information, and click USB.
- macOS: Lists the pad under its maker's name or a generic one.
- Check: The pad is there. It is not listed under Game Controllers in System Settings, and that is normal.
Apple's controller support covers PlayStation, Xbox, Switch and MFi pads, and games built on it look only for those. Listed in System Information means the Mac reads it; the Game Controllers list was never going to show it.
Map it in your emulator
OpenEmu, RetroArch and most other emulators read USB pads themselves, so for SNES and NES games the shortest path is the emulator's own controls screen.
- OpenEmu. Open its settings, go to Controls, and click each button on the picture, then press the matching button on the pad.
- RetroArch. Go to the menu below and choose Set All Controls.
RetroArch: Where the button assignments live.
Settings, Input, RetroPad Binds, Port 1 ControlsWhat happens: Set All Controls asks for each button in turn, and you press it on the pad.
More detail per emulator is on emulator controller not working and OpenEmu controller not working. Neither needs InputConfig, and a preset that maps the same buttons while the emulator also reads them makes every press arrive twice.
Use it as a keyboard everywhere else
Browser games, Scratch projects, keyboard-only Mac games and plenty of apps never read a USB pad. InputConfig reads it and sends the keys they do read. Get InputConfig free on the Mac App Store; it needs macOS 14 or later.
Step 1: Find the pad
- You: Open InputConfig and plug in the pad.
- InputConfig: Lists it at the top of the sidebar within a few seconds.
- Check: If it does not appear, click Refresh Controllers in the controller chip's popover, or choose InputConfig, Devices in the menu bar and tick the pad by name. The app remembers it next time.
Step 2: Watch it light
- You: Press a few buttons with a preset's page open.
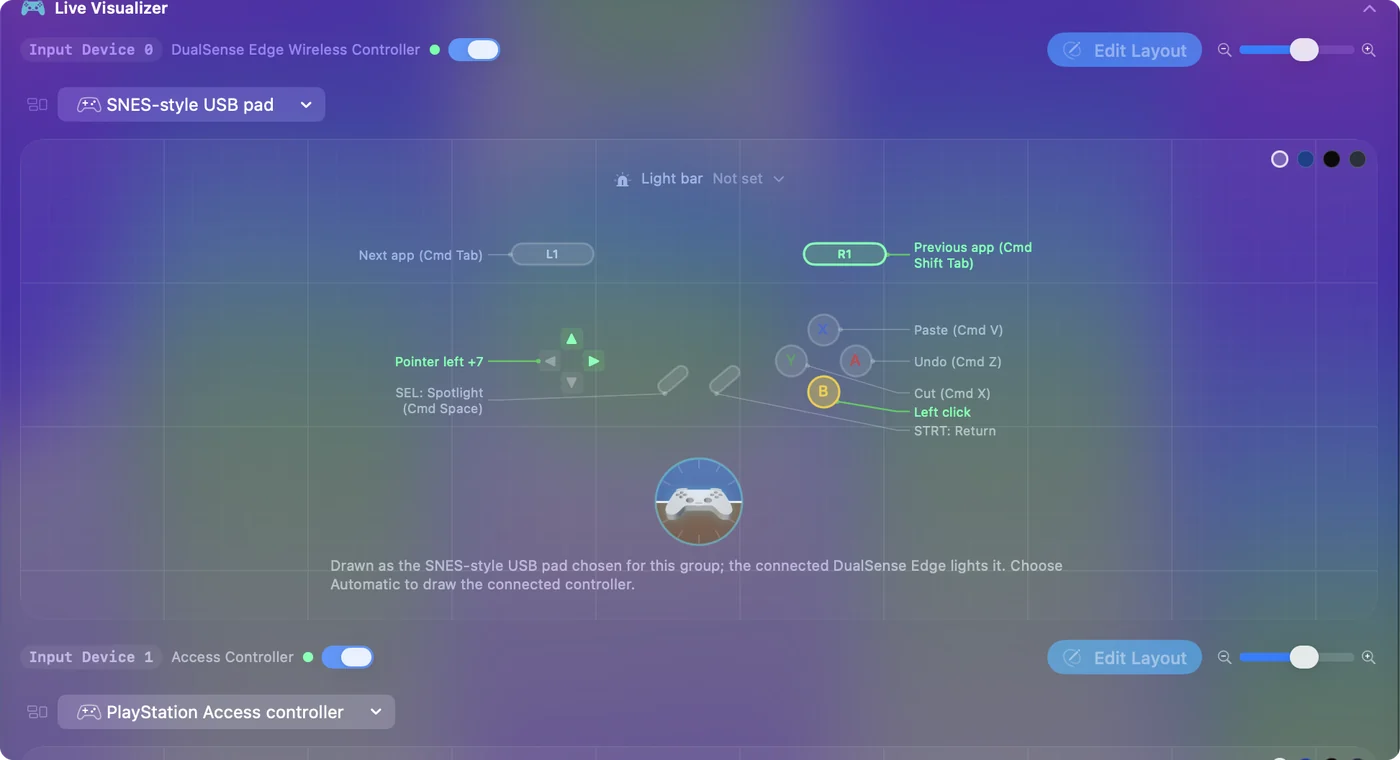
- InputConfig: Lights each one in the Live Visualizer. A pad it does not recognize by model is drawn as a plain map of what it reports.
- Check: To see it drawn as a SNES pad instead, open the panel's menu, choose Controllers, and pick SNES-style USB pad under Other. Your pad then lights that drawing.
Step 3: Bind and activate
- You: Make a preset, press Scan on a row, press a button on the pad, and pick the key it should send. Repeat for the D-pad and the rest, then press Activate.
- InputConfig: Sends those keys while you hold the pad.
- Check: The game or app responds as if you typed.
Most two-player browser games put player one on W, A, S, D and player two on the arrow keys, and many single-player ones use the arrows with Z and X. A D-pad and four face buttons cover all of those. The Smart Preset Maker's game layouts are built for a full controller, so rows it puts on sticks do nothing on a SNES pad; move them to the D-pad or a spare button with Scan. Arrows on the D-pad and Z and X on two face buttons cover most browser games.
 InputConfig is free on the Mac App Store. macOS 14 or later, no account, no tracking, open source.
Know what InputConfig 1.6 knows about these pads
InputConfig 1.6 carries the macOS rows of the community SDL GameControllerDB, the same button database many games and emulators use. Its SNES rows include the Tomee SNES Controller, the Retrolink SNES Controller, the NEXT SNES Controller and the iBuffalo Super Famicom Controller. When a pad matches one, its buttons are named and placed like any other controller's, and its D-pad reads as a D-pad.
- Numbering by position. The bottom face button, printed B on a SNES pad, is the same slot as A on an Xbox pad and Cross on a PlayStation pad. So a preset made on an Xbox pad puts its A action on the SNES B button, which is the same spot under your thumb.
- Look-alike pads. Cheap pads often share one chip and one USB ID, so two pads that look alike can report the same ID and still wire their buttons differently. InputConfig uses a community row only when it matches the pad exactly, or when every row for that ID agrees.
- No matching row. InputConfig reads the pad's own description of itself and numbers the buttons in the order the pad reports them. The labels in the editor are generic, and on many of these pads the D-pad scans as the left stick, because that is how the pad reports it.
Everything still works without a community row; bind each control as it scans.
If A and B, or X and Y, are swapped
A SNES pad has A on the right and B at the bottom. An Xbox pad has them the other way round, and most PC games and their button prompts follow Xbox. Nothing is broken: the pad is reporting the button by its position. Three ways to deal with it:
- In an emulator. Map each button in the emulator's controls screen, and it uses whatever you press.
- In InputConfig. Rows follow the button you press during Scan, whatever its letter. To change what the editor calls them, pick Nintendo letters, or North, South, East and West, in Settings, Devices, Face button names.
- In a game with Xbox prompts. Its A is your B.
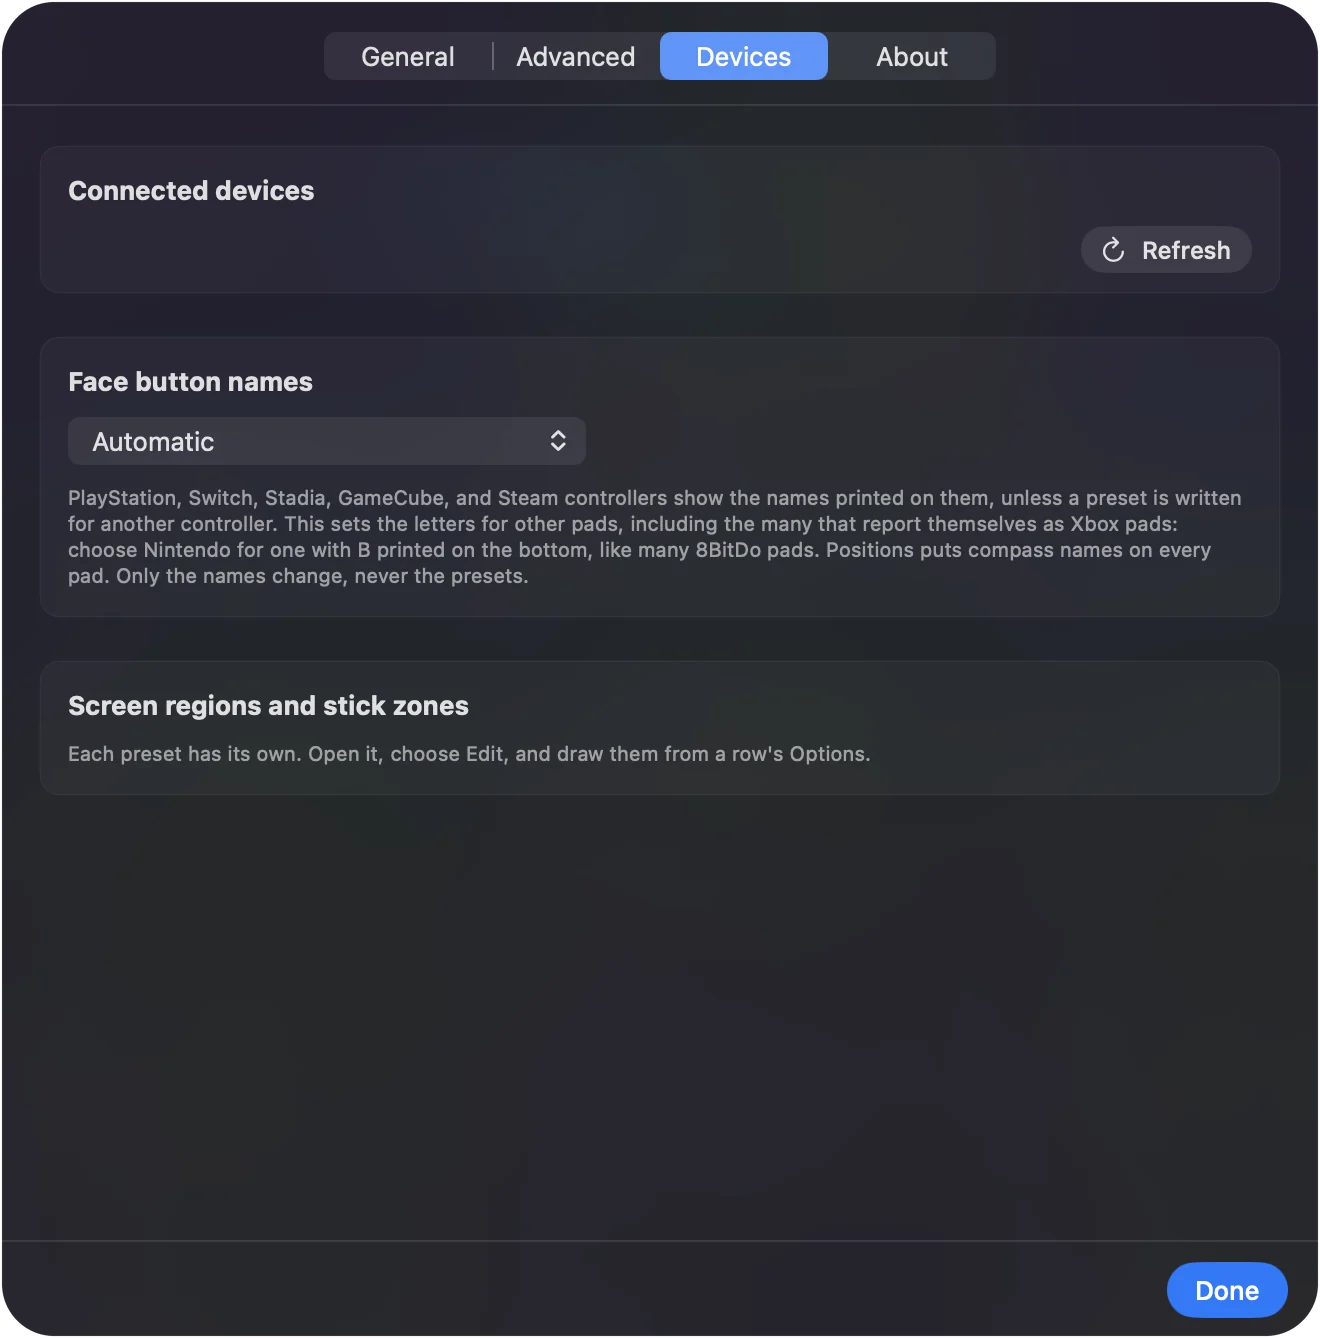
Scan binds the button under your thumb, so the letters never decide anything.
Update rows from presets made in 1.5
InputConfig 1.5 numbered generic USB pads another way.
- You: Connect the pad for the first time after the update.
- InputConfig: Lists any presets made before 1.6 that have rows for it, under the heading Update rows for, followed by the pad's name.
- Check: Tick the presets you made on that pad and click Update Ticked Presets, and their rows move to the controls you pressed back then. Leave Them As They Are skips it.
If you skipped it, Settings, Advanced, Data & storage, Check Older Presets Again brings the list back the next time the pad connects.
If it still does not work
Climb this ladder, smallest step first:
- Plug in directly. If the pad is missing from System Information, plug it into the Mac rather than a hub, try another port, and on a MacBook use a USB-C adapter that carries data. These pads have their cable built in, so a bad adapter is the usual suspect.
- Refresh and tick. Not in the sidebar: click Refresh Controllers, then tick it in InputConfig, Devices.
- Bind the D-pad as it scans. Without a community row, the pad's D-pad arrives as the left stick's axes. Scan binds it fine; a diagonal holds both of its keys.
- Stop the double press. One press, two actions: an emulator or game is reading the pad and InputConfig is sending a key too. Turn off one of the two, or give that app its own preset with auto-switch.
If System Information lists it, InputConfig can read it.
What it cannot do
A game that only accepts a controller through Apple's support will not see a USB SNES pad, and InputConfig cannot change that: it sends keys and mouse, not a controller. If the game also plays on a keyboard, map the pad to those keys.
The short version
- Emulators. Map the pad in the emulator's own controls screen.
- Everything else. InputConfig, Scan each button, pick its key, Activate.
- A and B swapped. It is position, not a fault. Scan binds what you press.
A cheap pad and five minutes of Scan make a fine Mac controller for anything that takes keys.
Questions
Do I need a driver for a USB SNES controller on a Mac?
No. macOS reads USB SNES and NES style pads as standard HID devices with nothing installed. A driver would not make Mac games see it either.
Why is my USB SNES controller not in System Settings, Game Controllers?
That list only shows controllers Apple's game controller support recognizes, such as PlayStation, Xbox, Switch and MFi pads. A USB SNES pad is a plain HID device, so it is listed in System Information, USB instead.
Does a USB SNES controller work in OpenEmu?
Yes. OpenEmu reads USB pads directly: open its settings, go to Controls, and assign each button by clicking it on the picture and pressing it on the pad.
Can I use a SNES controller for browser games on a Mac?
Some browsers read USB pads through the web Gamepad API, and games written for it will see the pad. Most browser games only read the keyboard, and InputConfig can map the pad's D-pad and buttons to the arrow keys and letters they use.
Do NES style USB controllers work the same way?
Yes. They are the same kind of HID device with a D-pad, A, B, Select and Start, and everything on this page applies with fewer buttons to bind.
Related
Free. macOS 14 or later. No account, nothing leaves your Mac. Open source on GitHub.